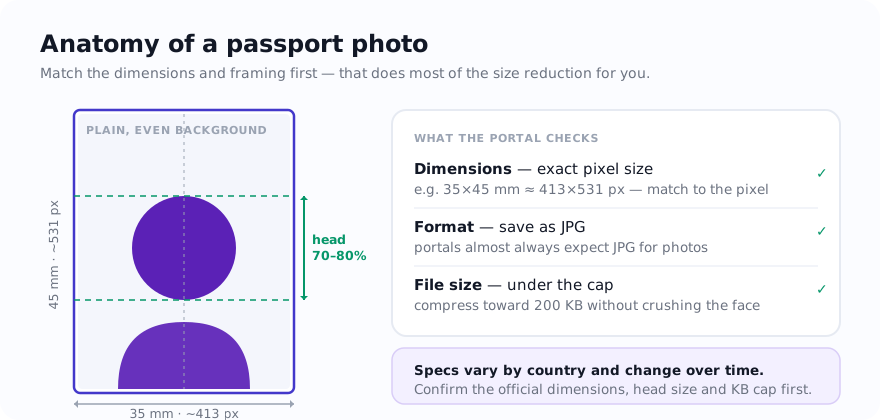
Photo-upload rules for passports, visas, and exams can combine several requirements: a file-size range, dimensions, format, framing, and background. The exact rules vary by authority and portal. For supported images, this site's selected-file editing path runs on the device; ordinary page, library, diagnostic, and consent-controlled requests may still occur.
Start with the official spec
Before touching the image, find the current requirement from the issuing authority or upload portal. Dimensions, format, background colour, head size, and file-size ranges vary by country and service, and they can change over time. Keep the notice open while preparing and checking the copy.
Step 1: get the dimensions and framing right
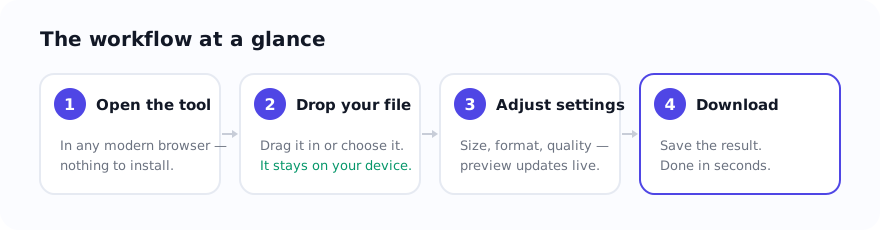
Use the Passport Photo Maker or Crop Image to match the stated dimensions and framing. Apply a background change only if the current instructions permit an edited background, then inspect edges and facial detail. Cropping and resizing can reduce bytes, but the result depends on the source and required dimensions.
Step 2: hit the file-size cap
- Confirm the dimensions and framing against the current portal instructions.
- Use the listed format rather than assuming JPG, PNG, or another type.
- Compress toward the cap using the main compressor, then leave some margin below a stated maximum because encoders use discrete steps.
- Verify the downloaded copy for bytes, dimensions, format, facial detail, background, and framing before upload.
Common reasons photos get rejected
- Wrong dimensions — match the current specification in the units it states.
- File too large — fixed by the compress step above.
- Background mismatch — follow the authority's current colour, lighting, and editing rules.
- Over-compression — if the face looks blocky, return to a better source and use the required dimensions with a less aggressive quality change.
- Framing mismatch — compare head size, pose, and placement with the official examples.
Get the source photo right first
Software can crop, resize, and compress, but it cannot fix a badly taken photo. You will save yourself a rejection by getting these right at capture time:
- Even, front-on lighting — face a window or soft light so there are no shadows on your face or behind your head. Harsh side light is a common rejection reason.
- Plain background — stand a step away from a clean white or light wall so it stays evenly lit and shadow-free.
- Neutral expression, eyes open, facing the camera — no smiling on most passport specs, and no hair across the eyes.
- No glare on glasses — many authorities now prefer no glasses at all; if you wear them, angle to kill reflections.
- Fill the frame correctly — leave room above the head so the crop to the required head proportion is easy.
Start from a sharp, evenly lit, front-facing shot and the editing steps above become trivial. Start from a dim, angled selfie and no amount of resizing will make it pass.
Always verify the official requirement
This workflow gets you to a clean, correctly sized photo, but the final word on dimensions, background, head size, and file size belongs to the government department or portal receiving it. Confirm their current rule before you submit — no online tool can guarantee acceptance, because the authority sets the standard. Everything here runs in your browser, so your photo is processed on your device and not uploaded during the preparation.
Use the tool: Passport Photo Maker — free, with selected-file processing performed on the device for supported inputs.
Related guides
Sources and verification
- ICAO Doc 9303: Machine Readable Travel Documents — International technical standards; the issuing authority’s current photo instructions still control each application.
Frequently asked questions
What size should a passport photo be?
It depends on the country and portal — confirm the exact pixel dimensions and file-size limit with the issuing authority, because they vary and change. The tool can match whatever spec you are given.
Why does my passport photo exceed 200KB?
The dimensions are likely larger than required. Set the correct pixel size first, save as JPG, then compress toward 200KB.
Does the tool guarantee my photo will be accepted?
No tool can guarantee acceptance — the authority sets the rules. It helps you meet common requirements; always verify the current official spec before submitting.